
Table of Contents
- Why Kitchen Workflow Optimisation Matters
- Step 1: Assess Your Current Kitchen Layout and Workflow
- Step 2: Apply Commercial Kitchen Layout Design Best Practices
- Step 3: Implement Kitchen Workflow Management Tools
- Step 4: Reduce Kitchen Staff Fatigue During Shifts
- Step 5: Establish Clear Communication Protocols
- Common Mistakes to Avoid When Optimising Kitchen Workflow
- Measuring Success and Continuous Improvement
- Frequently Asked Questions
Last Updated: September 20, 2026
Why Kitchen Workflow Optimisation Matters
A chaotic kitchen costs money. Staff work longer hours, mistakes multiply, and food waste climbs. The best restaurants don’t just cook well, they move well.
Kitchen workflow optimisation is the practice of designing your kitchen layout, processes, and communication systems so that work flows smoothly from prep to plate. When done right, it reduces stress on your team, cuts costs, and improves the quality of what leaves your kitchen.
Operational Chef Consultant works with hospitality businesses across the UK facing the same challenge: how do you get more done with the same resources? The answer isn’t hiring more staff. It’s making the kitchen work harder for you.
Poor workflow doesn’t just frustrate chefs. It burns them out. Staff fatigue during shifts leads to mistakes, slower service, and turnover (pubmed.ncbi.nlm.nih.gov). When your best people leave because the kitchen is exhausting, you’re back to square one. Optimising your kitchen workflow directly addresses this, it makes the job easier and more sustainable.
The biggest gains come from fixing the small inefficiencies nobody notices until you map them out. A chef walking 10 extra steps per service might seem trivial. Multiply that across 200 covers and 300 days a year, that’s thousands of wasted steps annually.
Step 1: Assess Your Current Kitchen Layout and Workflow
Start by watching your kitchen work. Don’t change anything yet, just observe.
Map where your staff spend time. Where do they walk the most? Where do they wait? Where do bottlenecks form? Common problem spots include:
- Prep stations too far from cooking stations
- Ingredients stored away from where they’re used
- Pass positioned where it blocks other movement
- Plating area cramped or poorly lit
- No clear flow from raw ingredients to finished dish
Walk through a full service yourself if possible. Time how long tasks take. Note where staff have to backtrack or wait for equipment. Ask your team where they get frustrated, they’ll tell you things you’d never spot from the office.
Document your current layout. Take photos. Sketch it on paper. Include where equipment sits, where ingredients are stored, and where staff stations are positioned. This baseline matters because you’ll measure improvements against it.
The goal here isn’t perfection, it’s understanding what’s actually happening versus what you think is happening.
Most kitchen problems aren’t caused by lazy staff. They’re caused by layouts that force staff to work inefficiently. Fix the layout first.
Step 2: Apply Commercial Kitchen Layout Design Best Practices
Commercial kitchen layout design best practices are built around one principle: minimise movement, maximise efficiency.
The classic model divides your kitchen into zones: prep, cooking, plating, and storage. Work flows in one direction as much as possible. Ingredients arrive, get prepped, move to cooking, then to plating. Dirty dishes exit separately.
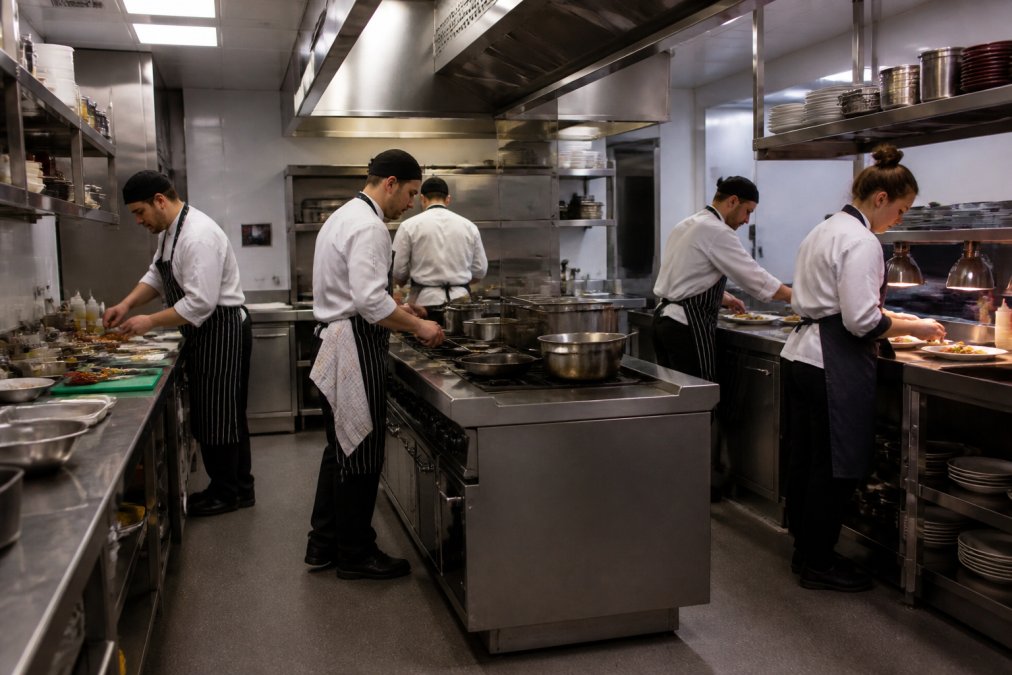
Here’s what works in practice:
Storage near prep. If your vegetable prep is 20 metres from where vegetables are stored, you’re wasting time every single service. Store ingredients close to where they’re first used.
Prep stations before cooking stations. Raw ingredients should move forward, not backward. If a chef has to walk back to grab something they missed, your layout is fighting them.
Cooking equipment clustered. Ovens, ranges, fryers, group them so one chef can manage multiple stations without excessive movement. A chef shouldn’t have to run between distant pieces of equipment during service.
Pass positioned for visibility. Your pass is where food gets plated and checked. Position it so the head chef can see the entire kitchen. If the pass is tucked in a corner, you lose control.
Plating area separate from cooking. Plating is detail work. It needs good lighting, a clean surface, and space to breathe. If your plating happens on a cramped corner of the range, quality suffers.
Dirty dishes exit the other direction. Soiled pans and plates should leave the kitchen without crossing the path of clean food. Cross-contamination risk and traffic jams both drop when you separate dirty from clean flows.
The layout that works depends on your kitchen type. A fine-dining kitchen with complex plating needs different spacing than a high-volume casual restaurant. But the principle stays the same: design so work moves forward.
The most common mistake is trying to fit too much into too small a space. When every station is cramped, staff collide, communication breaks down, and mistakes spike. Better to remove a station and work with what fits comfortably than cram everything in.
Step 3: Implement Kitchen Workflow Management Tools
Kitchen workflow management tools help you control the pace of service and track what’s happening in real time.
Start with the basics: a ticket system. Orders come in as tickets. Each station knows what they’re cooking and when. The pass controls the flow, tickets move through the kitchen in sequence. Without this, chaos happens. Refining this sequence requires a deeper look at kitchen ergonomics principles to ensure that every movement between the pass and the stations minimises wasted effort and physical strain.
Physical tickets work for small kitchens. For larger operations, a digital kitchen display system (KDS) makes more sense. Orders appear on screens at each station. Chefs mark dishes as they complete them. The pass sees real-time progress.
What matters more than the tool itself is how you use it. Set clear rules:
- Tickets print in the order they must be cooked
- Each station works in ticket order, no jumping ahead
- The pass controls the pace, no dish leaves before the pass checks it
- Communication is clear: “Behind,” “Hot,” “Corners” keep people safe
A simple whiteboard works if your system is consistent. Expensive software fails if nobody follows the process.
Track your timing. How long from ticket to plate? Where do delays happen? If plating takes 8 minutes but cooking takes 3, your plating is the bottleneck. Fix that before you worry about cooking speed.
The best kitchen workflow management tool is the one your team will actually use. Buy something complicated that nobody understands and it becomes expensive clutter. Buy something simple that fits how you work and it becomes invisible, it just works.
Step 4: Reduce Kitchen Staff Fatigue During Shifts
Reducing kitchen staff fatigue during shifts isn’t just kind, it’s profitable. Tired staff make mistakes. Mistakes cost money (pubmed.ncbi.nlm.nih.gov).
The physical demands of kitchen work are real. Long hours standing, heat from equipment, repetitive motions, and high pressure all add up. But some of that fatigue is preventable.
Rotate stations during service. A chef working the range for 6 hours straight is exhausted. Rotate them to prep or plating halfway through. Different muscles work, mental focus resets, and fatigue spreads across the team instead of crushing one person.
Build in breaks. A 10-minute break mid-service where someone steps outside or sits down matters more than you’d think. Fatigue compounds, a small rest prevents the crash that happens at hour 5.
Reduce unnecessary movement. This goes back to layout. If your kitchen forces staff to walk 50 metres per cover, that’s thousands of steps per service. Better layout means less walking, less fatigue.
Keep the kitchen cool. Heat exhaustion is real. Ensure ventilation works properly. On hot days, extra water and fans help. A kitchen at 35°C versus 28°C makes a measurable difference in how long staff can work safely.
Staff the right stations with the right people. Put your strongest chef on the busiest station. Put your detail-oriented chef on plating. Put your fastest prep person on prep.
Step 5: Establish Clear Communication Protocols
Communication breakdowns cause accidents, delays, and wasted food.
“Behind” when passing behind someone. Everyone knows someone’s coming and moves or stays still accordingly.
“Corners” when turning a corner with something. Prevents collisions.
Communication protocols feel formal and rigid until they’re part of your culture. Then they become invisible, just how your kitchen works. Train new staff on them immediately. Consistency matters more than the exact words you use.
Common Mistakes to Avoid When Optimising Kitchen Workflow
Trying to change everything at once. Pick one problem and fix it. Once that works, move to the next. Big overhauls overwhelm staff and often fail.
Measuring Success and Continuous Improvement
Measure what matters: speed, consistency, and staff retention.
Service time. How long from ticket to plate? Track this before and after your changes. Most kitchens see improvement with better workflow, but the exact number depends on where you started.
Frequently Asked Questions
What are the five main kitchen work zones?
The five core zones in kitchen workflow optimisation are: prep station (vegetable and protein preparation), cooking zone (grills, ovens, hobs), plating station (finishing and presentation), washing area (dishwashing and sanitisation), and storage (dry goods and refrigerated items). Each zone should be positioned to minimise staff movement between stations, reducing fatigue and improving efficiency. Proper spacing prevents bottlenecks and allows multiple team members to work simultaneously without collision or cross-contamination.
How does kitchen layout affect staff productivity?
Layout directly impacts productivity by determining how many steps staff take per service and how often they wait for access to equipment. A poorly designed kitchen forces chefs to walk excessive distances, hunt for tools, or queue at shared stations. Optimised layouts reduce unnecessary movement by up to 30%, freeing time for actual food preparation. Better layouts also reduce stress and fatigue, which improves focus, reduces errors, and lowers staff turnover, a critical factor in hospitality where recruitment gaps are common.
What are the common causes of kitchen workflow bottlenecks?
Common bottlenecks include: inadequate prep space causing delays before service, single-point access to essential equipment (one oven, one hob), poor communication leading to duplicate or missed tasks, insufficient storage forcing staff to search for ingredients, and unclear station responsibilities. Bottlenecks cluster during peak service times and amplify stress. Identifying these pinch points, through observation or staff feedback, is the first step in kitchen workflow optimisation. Many bottlenecks can be resolved through layout changes, tool placement, or process redesign without major capital investment.
How can I improve communication in a busy commercial kitchen?
Clear communication prevents duplicate work, missed orders, and staff confusion. Establish call-outs for key milestones (“picking up on table 5”, “two minutes on that wellington”), use a ticket system visible to all stations, hold brief pre-service briefings to confirm specials and priorities, and designate a kitchen lead to coordinate during service. Written station checklists and colour-coded prep labels reduce reliance on verbal instructions. Regular team debriefs after service identify communication breakdowns and build shared understanding of workflow priorities.
